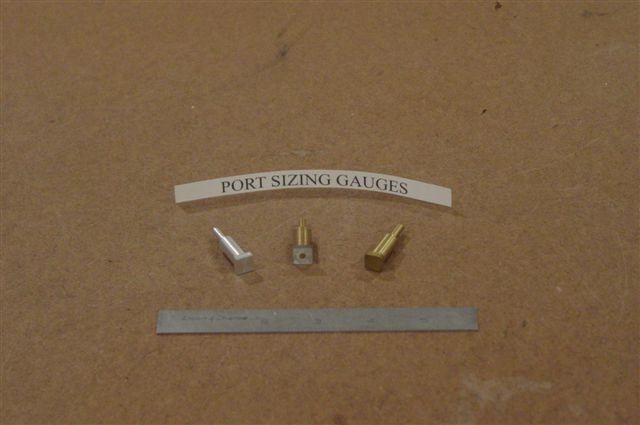
Gun Port Sizing Gauges directions:
"Port
Sizing Gauges.
1. Material Aluminum
2. " Brass
3. " Brass / with Tool Steel Square. (heat treated (hardened) and
ground to size)
The dimensions are typical.
Overall length is 1 1/2"
The shank is 5/32" Diameter by 1/2" long
The body is 5/16" Diameter by 7/8" long
The square is either 9 MM (.354") or 10 MM (.394")
They can be made any size to suit the gunport openings for any model.
Machining Instructions:
Chuck up a piece of material large enough to allow the square to be milled
in.
If you are not sure what size material to use, just layout on paper a
square of the desired size.
Take a compass, mark off the center of the square. Now adjust
the compass until you circumscribe a circle that is large enough to include
the points of the square. That will be the diameter of your starting
material. Or you can go to page 81 (in my copy) of "Machinery's
Handbook".
There is a chart for "Distance Across Corners of Squares and Hexagons".
"
d" is given as the size of the square
"
E" is given as the distance across the corners.
However, the chart is given in fractional numbers only. The good news is, they also include a formula to obtain the "E" dimension
with any known "d" dimension.
E = 1.4142"d
In my case, 9 MM (.354") "d" by 1.4142" = .5006" (1/2" Diameter
would work)
10 MM (.394") "d" by 1.4142" = .5571" (9/16" Diameter would work.)
If you require really sharp corners. I would suggest going slightly
larger to offset any runout of your stock material.
Have the stock protruding out of the chuck long enough, so that you can
turn the diameters,
and lengths in one setup, to insure concentricity.
It is not a requirement in this application, but purely good work habit.
Turn
the 5/32" shank diameter first by 1/2" long.
Face off the shoulder . Next, turn the 5/16" body diameter
by 7/8" long. Make sure you face off the part (shoulder) at the end of the 5/16" body
diameter,
because that will form the back surface of the square that will be
milled in later. Now, cut off the piece, making sure to cut
it long enough, to include the part that will be milled to
form the square. Since the finished overall length is 1 1/2",
I would cut off at least 1 9/16".
Now, turn the part around, chuck up on the 5/16" body diameter,
to keep things rigid.
Face the part off to length, thereby forming the front face of the
square.
In
the case of the gauge with the toolsteel square, I turned in a holding
diameter of 5/32" diameter for the subsequent press fitting
at assembly. Mill the square in the milling machine. (except for the tool steel
one)
If you are fortunate enough to have an indexing head, or rotary
table, good. If not, clamp the part in the vise on the milling
machine, using a V block to hold the part vertically.
Now,
cut the square in by removing equal amounts from each side to guarantee
centralization.
Remove the burrs with a fine file, or stone, and two of them
are done.
Take a piece of tool steel, 1'8" by 7/16" square (to allow
for sizing).
Drill and ream a close fitting hole 5/32" (.1562" Diameter).
Heat treat it in a oven or with a torch, quench it in the proper
medium,
which can be oil, water, or air, depending on the tool steel
selected.
Polish it with emery cloth, so you can observe the color changes
when you temper (or draw) it.
Press
it on the 5/32" Diameter of the front of the third gauge. Now,
clamp it in a precision V block. Grind it in a surface grinder to
form the square to the dimension. I know, you
don't have a surface grinder!
So, go make friends with the guy in the local machine shop
or toolroom. :)
In
use, the gauges come in very handy, for marking out gunport positions,
to scribe around, so you can use the drilling out (roughing)
of the inner size, to allow you to file the ports to size
after.
And, when you are ready for those really nice sharp corners,
and having carefully filed out the corners with a good needle
file, you can use the tool steel one as a broach,
by slowly wiggling it in as you gently push forward to form
the final shape and size, don't force it, use the
needle file to remove any resistance areas.
They
will show up as bunched little slivers of wood.
By the way, put your gauges in pin vise handles for ease
of use."