Tool
Holder directions:
How it all came about. My website partner, Scott Bushnell is working on the Sergal/Mantua " Sovereign of the Seas". The scale is 1:78. He asked me to make the Gun Carriages for him because he was unhappy with his attempts. They were to be made of walnut, and will be painted red. Note: Please keep in mind that this Fixture could be made to suit any scale/model.
Calculations: The numbers: Scale is 1:78 Cheeks are .085" thick by .329" wide/high by 1.048" long. There are two sizes of axle trees because the gun carriage is narrower at the front than at the rear. The front axle tree is .085" thick by .197" wide/high by .450" long. The rear axle tree is .085" thick by .197" wide/high by .508" long. The dimensions for the locations of the axle trees and cheeks were taken from the plans supplied with the kit. Make an accurate layout, to scale, of the overhead view of the Gun Carriage in a large format. This is useful because it pinpoints possible trouble spots when making the fixture.
I used the multiple of 14. The 1.048" length of the cheek became 14.672" The .450" width of the axle trees at the front of the Gun Carriage became 6.300" The .508" width of the axle trees at the rear of the Gun carriage became 7.112". The angle , when calculated, of the sides of the cheeks is one degree and thirty five minutes. I arrived at this number by applying the trig formulas using the .450" and .508" and 1.048" dimensions of the respective parts. This helped when planning the location of the containing dowel pins for the outboard sides of the cheeks.
Cutting and preparing the parts for the carriages; Axle trees and cheeks; Cut some blank strips for the t-shaped axle trees with a Preac ( or similar ) table saw. They were made to the following dimensions from the plans.
Front axle trees - strips were cut to .450" wide by 6" long out of some 6mm ( .236" ) stock. Rear axle trees - strips were cut to. 508" wide by 6" long out of the same 6mm stock. Note: I had to make about 24 carriages so cut plenty of extra material to cover setup, goofs, etc...... After the cutting of the blank strips, reduce the thickness down from 6mm to .197" using a Byrnes ( or similar) thickness sander. The cheeks are .085" thick by .329" high by 1.048" long. Note: I did not have stock wide enough to make the .329" height. So, I glued up two pieces at a suitable joint to make up the required dimension. Plus some allowance for the thickness sanding after.
The axle trees are also .085" thick by .197" by .450" ( front axle trees) and .508" Rear axle trees ) respectively. Milling; The T-shapes are milled in a Sherline ( or similar) vertical milling machine. The cheek profile is milled in the same milling machine, but used as a shaper. Clamp a precision parallel to the table aligned with the table travel ( X axis) . Push the blank strips through , against the parallel fence while having a piece of spring steel bear against the edge.
Slicing; Slice all the blank strips to the .085" thickness. Use the Preac for the axle trees. Since the Preac can only cut about 1/4" thick,I used the Byrnes saw for the cheek blank strips. Note: Use a special thin kerf blade to do this....... .020" thick. Works fine....
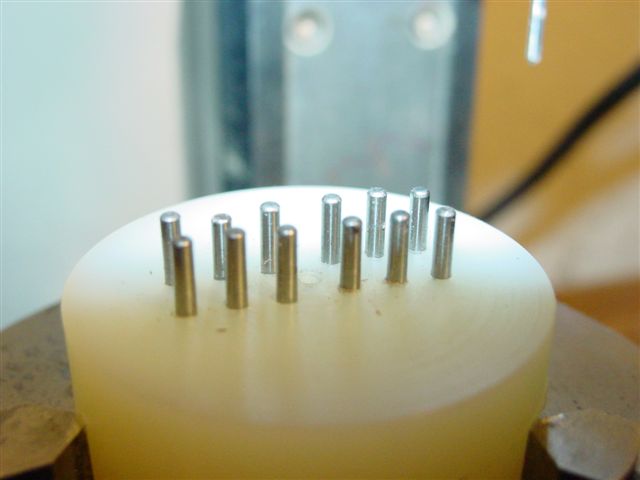
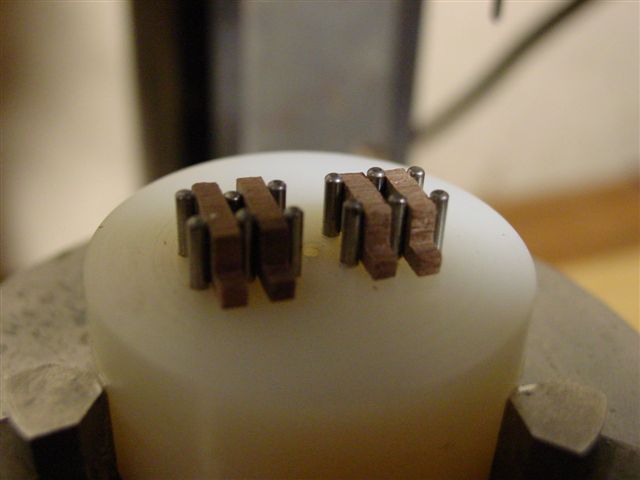
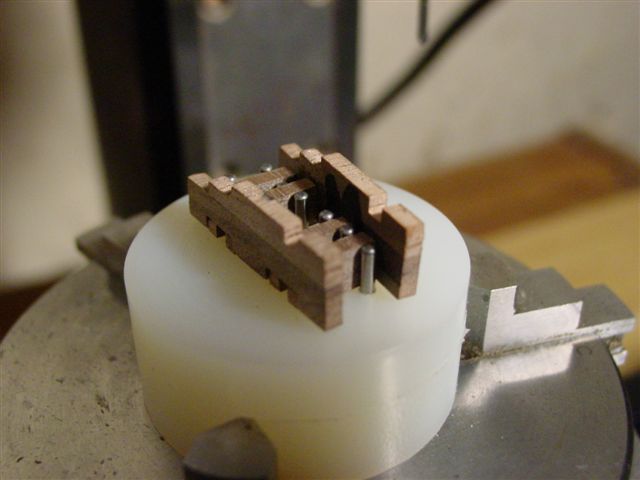
Making the Gun Carriage Assembly Fixture; Use the Sherline lathe ( or similar) to turn a piece of nylon to 1 1/2" diameter. ( Nylon was chosen for the fixture because the glue will not adhere to it.. Face it off, and leave it in the chuck. Put the chuck with the nylon on the rotary table on the Sherline Milling Machine. Make sure to align the center of the rotary table with the center of the mill spindle. Do the math and center drill , drill and ream for a total of 12 ( twelve) .0625" holes for Stainless Steel dowel pins. ( Stainless won't corrode over time.) These hole locations cause the axle trees and cheeks to be in the correct relationship. As you can see in the photos.