| Foot Rope Fixture (3 of 3) | |
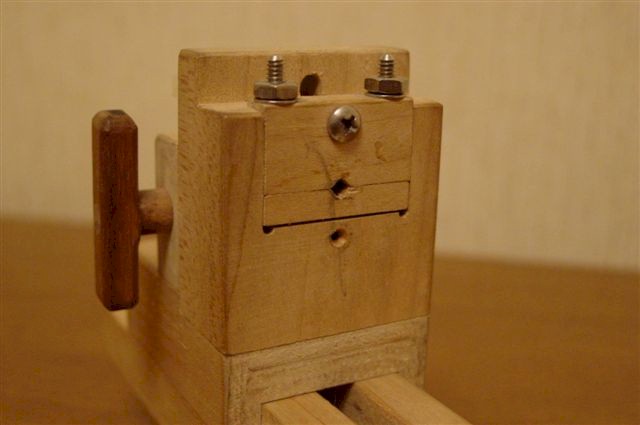 |
Foot Rope Fixture "Once the line has been threaded through the fixture, you secure it by taking a few turns around the tension keys and put a little tension on the line. The keys function much like the tensioning devices on a guitar, for the strings. Be careful here because too much tension can easily snap the line. Also, you have to learn how much tension to have in the line because you can end up with bad results when you are ready to release the yard from the fixture. Practice! Now you have the yard clamped in place, the line threaded through the fixture. There is an adjustment built into the fixture to maintain the scale 3 feet (according to Mastini) between the top of the yard and the line (footrope). It is adjustable to accomodate different scales. Mine is the Victory by Corel at 1:98. So 36" divided by 98 is .367". On my fixture, the line is fixed and the double V block that clamps the yard is able to travel up and down and carry the yard with it. Just make sure that each double V block clamp is adjusted to maintain parallelism between the yard and the line. The fixture can be made any size you want, to work with the yards of your particular model. Once you have made the adjustment for the distance from the top of the yard to to the line, you can you can now tie your stirrups in place. I make tic marks on the yard and when the clove hitches are made, the tic marks are hidden by the line around the yard. Of course, the fixture can be used to rig any blocks or horses, etc. to the yard because it is clamped in place. Once
you are done rigging a yard, loosen the clamp of the double V block, and
the locking screw of the traveling clamp/guide, and move it away from
the yard, and it will be free. " Parts
List |
| 1 2 3 |